
How to Install EmDash (Step by Step)
Create your first EmDash site on your own computer. One command sets up the project, then you finish the setup in your browser.
 By the Astro Nursery team. Review lead: Ankur Gandhi, VP of WordPressUpdated 9 minute readSome basics
Tested on Astro 7.4
In this guide
You can create an EmDash site with a single command. This guide shows each step, and what the installer creates for you.
New to EmDash? Start with what EmDash is.
What you need
- Node.js 22.23.4 or newer. EmDash asks for 22.16, but the Astro version it installs needs 22.23.4. Lesson 1 shows how to install it.
- A code editor, such as VS Code
- A terminal
About ten minutes, most of it waiting for the install.
Step 1: Run the installer
In your terminal, run:
npm create emdash@latestIf npm asks to install the create-emdash package, press Enter to agree.
Step 2: Answer the questions
The installer asks a few questions. For a first site on your own computer, choose these answers:
| Question | What to choose |
|---|---|
| Project name | Any name, such as my-blog |
| Platform | Cloudflare |
| Template | Blog |
| Package manager | npm |
Pick Cloudflare even if you’re only trying it out. It runs on your computer just fine, with no account, and it’s ready to put online later with one command. Pick Node.js only if you’ll host it on your own server.
The other templates are Starter, Marketing and Portfolio. See all four.
You can also skip the questions and install everything in one go:
npm create emdash@latest my-blog -- --template cloudflare:blog --pm npm --install --yesWhen it finishes, you’ll see “Done! Your EmDash project is ready at my-blog”.
Step 3: Look at what was created
Open the new folder in your editor. These are the files that matter most:
| File or folder | What it’s for |
|---|---|
astro.config.mjs |
Turns on EmDash and sets the database and file storage |
src/pages/ |
The pages of your site, written in Astro |
src/layouts/Base.astro |
The layout every page shares |
seed/seed.json |
The starting content types and demo content |
wrangler.jsonc |
What your site needs from Cloudflare when it goes online |
AGENTS.md |
Notes that help AI tools like Claude Code work on your site |
.env |
A secret key that EmDash creates for you |
If you’ve used Astro before, this will look familiar. An EmDash site is an Astro project with the EmDash integration added.
Step 4: Install and start your site
Move into your project and start it:
cd my-blog
npm run dev
If you skipped --install in step 2, run npm install first.
$ npm run dev
— E M D A S H —  v1.4.0
› Admin UI    http://localhost:4321/_emdash/admin
astro  v7.4.7 ready in 3631 ms
┃ Local    http://localhost:4321/
Open localhost:4321. Before setup, the site says No posts yet. That’s normal.
Step 5: Finish the setup in your browser
Open localhost:4321/_emdash/admin. The first load takes a few seconds while it gets ready. Then a three-step wizard appears.
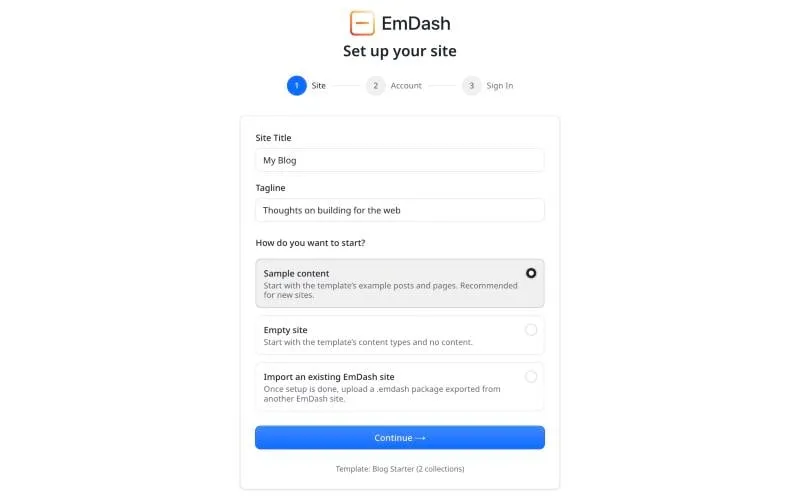
1. Site. Your site’s name and tagline are filled in for you. Change them if you like. Then pick how to start. Sample content fills the site with example posts, which is the best way to look around.
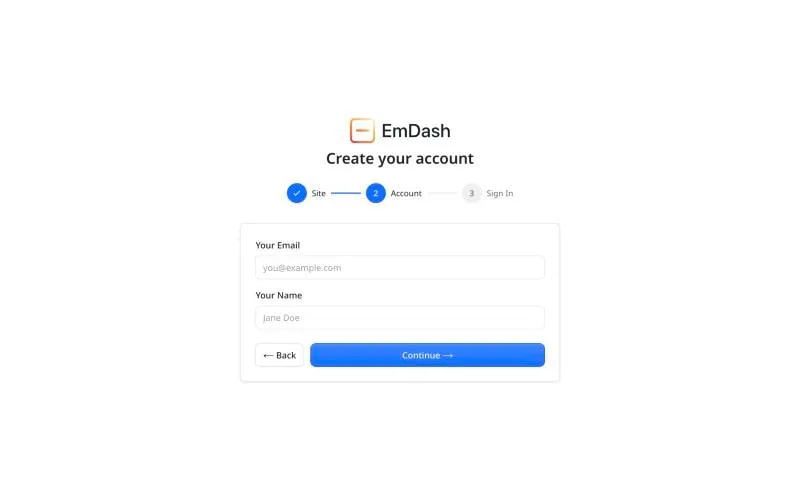
2. Account. Your email and your name.
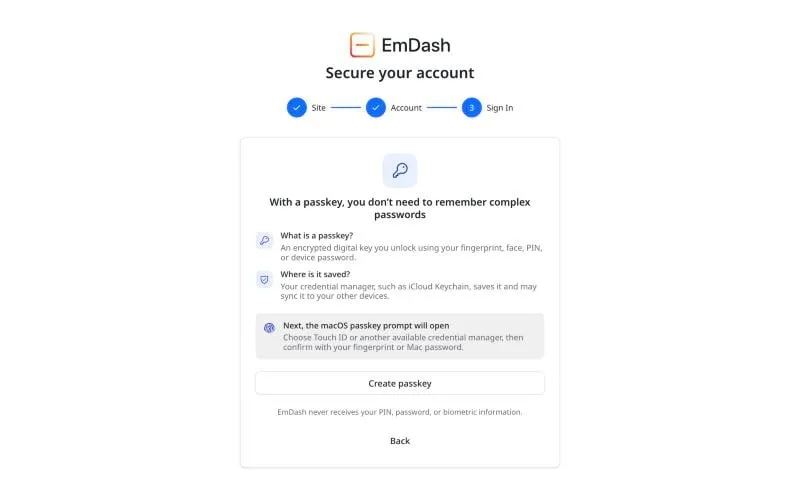
3. Sign in. Click Create passkey. Your computer asks for your fingerprint, face or password, and saves a key. You’ll use that to sign in from now on. No password to remember.
Then you land on your dashboard:
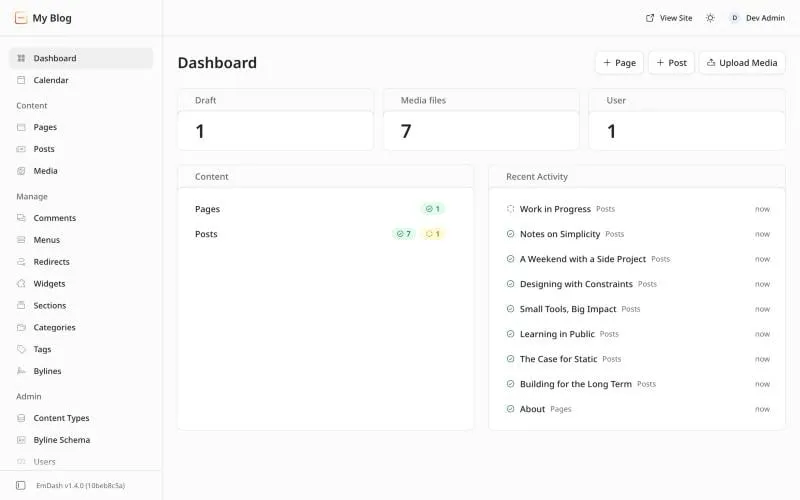
Your site is at localhost:4321, now full of sample posts, and your dashboard is at /_emdash/admin.
Or skip the install
Want it online without setting anything up on your computer? Use EmDash’s one-click button instead.
What to do next
- See what yours will look like online at our live demo, made with this same blog template.
- Write and publish your first post.
- Take a tour of the dashboard.
- Open
src/pages/index.astroand change some text, to see how the design works. - Bringing content from an old site? See how to move from WordPress to EmDash.
To put your site online, see how to deploy EmDash to Cloudflare.
Frequently asked questions
Which version of Node.js does EmDash need?
Use Node.js 22.23.4 or newer. EmDash itself asks for 22.16, but it installs Astro 7.4.7, which needs 22.23.4. Run node -v in your terminal to check.
Do I need a Cloudflare account to try EmDash?
No. We tried the Cloudflare template on our own computer with no account at all, and it ran. You only need a Cloudflare account when you put the site online.
Where is the EmDash admin dashboard?
On your own computer, it's at http://localhost:4321/_emdash/admin while the dev server is running.
Stuck on a step?
Check the common errors guide, look up a word in the glossary, or ask the friendly people in the official Astro and EmDash Discords. How to ask so people can help.